
Whipped cream isn’t just for special occasions; it’s for everyday moments too. The satisfaction that it can bring to your meals is exceptional. Whipped cream can be your secret weapon, whether making a quick breakfast for your family, preparing lunch, or crafting an elegant dessert for a dinner party.

The Basics of Whipped Cream
Before we dive into our delicious recipes, it’s essential to understand the foundation of whipped cream. Knowing what it is, how to make it, and why homemade is often better will prepare you for culinary success.
What is Whipped Cream?
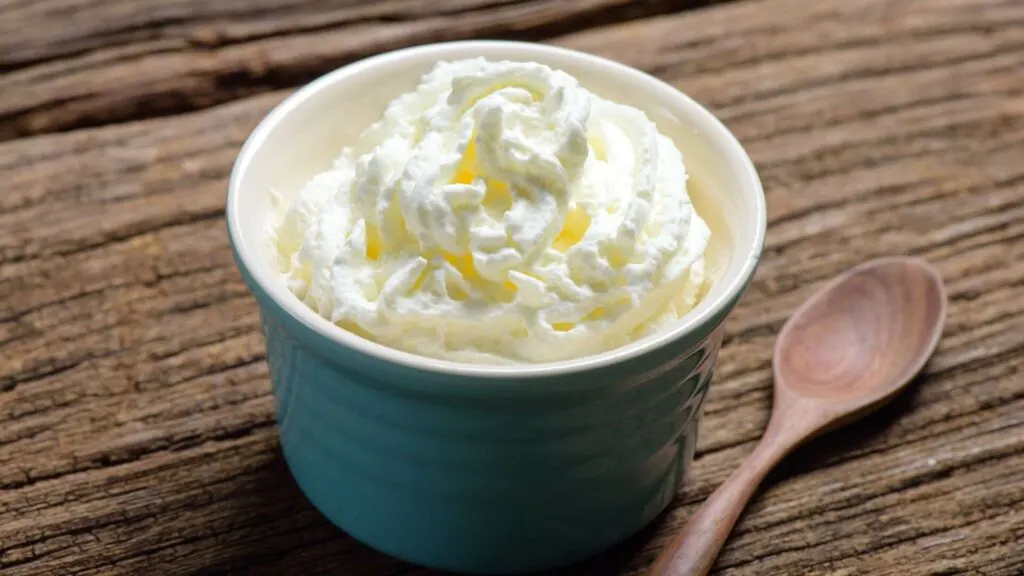
Whipped cream is essentially heavy cream beaten until it becomes light and fluffy. This transformation occurs because the air gets incorporated into the fat molecules, creating a stable foam.
Whipped cream is incredibly versatile, making it a beloved ingredient in sweet and savory dishes. It tops everything from hot chocolate and pies to soups and even savory hors d’oeuvres.
How to Make Homemade Whipped Cream
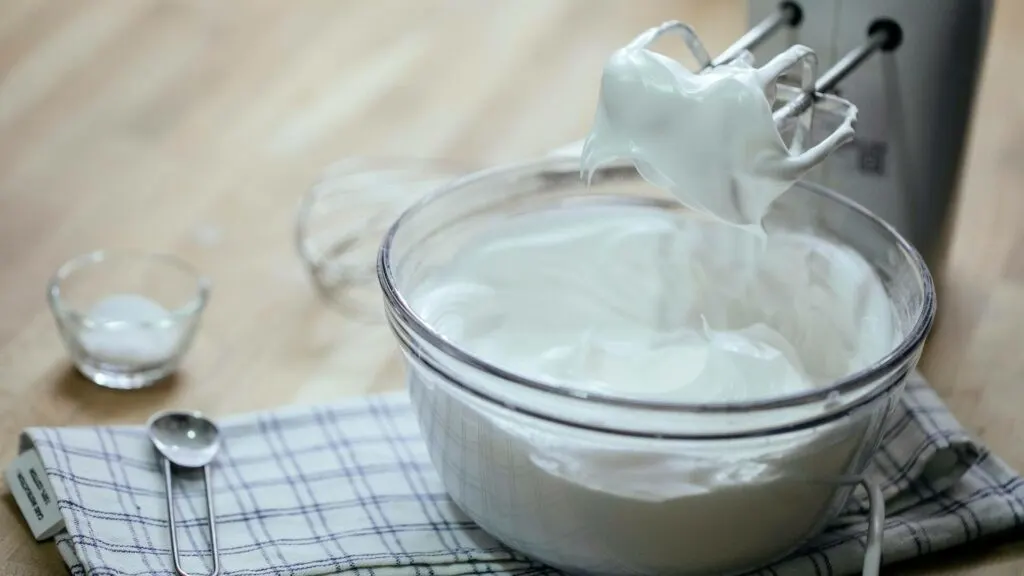
Making whipped cream from scratch is one of those culinary joys that everyone should experience. It’s simple, requires minimal ingredients, and the result is far superior to any store-bought version.
Here’s a simple whipped cream recipe to get you started:
Ingredients:
- One cup of heavy cream
- Two tablespoons of powdered sugar
- One teaspoon of vanilla extract
Instructions:
- Chill Your Tools: Place your mixing bowl and whisk (or beaters) in the refrigerator for about 15 minutes. Cold equipment helps the cream whip up more quickly and retain its structure.
- Measure and Combine: Pour the heavy cream into the chilled bowl. Add the powdered sugar and vanilla extract.
- Whip the Cream: Using a whisk, hand mixer, or stand mixer, beat the cream at medium to high speed. Start slowly to avoid splatters, then increase the speed. Whip until soft peaks form, meaning the cream holds its shape but curls over slightly when the whisk is lifted.
- Adjust to Taste: If you like sweeter cream, add a bit more sugar. For a thicker consistency, continue whipping until you reach stiff peaks, where the cream holds its shape firmly.
Tools Needed:
- Whisk or Electric Mixer: A whisk works well for small batches, while an electric mixer is ideal for larger quantities or if you want to save time and effort.
- Whipped Cream Chargers and Nangs: For those looking to make whipped cream more efficiently, a whipped cream dispenser with chargers (often called nangs) can be a game-changer. These chargers are small, pressurized canisters filled with nitrous oxide, which helps whip the cream quickly and uniformly. You can easily buy nangs and a cream whip dispenser from a shop selling baking supplies near you or online.
Benefits of Using Homemade Whipped Cream
There’s something satisfying about making whipped cream at home. Not only do you get to enjoy the process, but you also reap several benefits:
- Health Benefits: Homemade whipped cream is free from the artificial preservatives and additives in store-bought creams. You control the ingredients, which means you can avoid unnecessary sugars and chemicals.
- Freshness: The taste of freshly whipped cream is superb. It has a purity and freshness that pre-packaged creams can’t match. Plus, you can whip it up just before serving for the best flavor and texture.
- Control Over Ingredients: Making your homemade whipped cream lets you adjust the sweetness and flavor to your liking. Want a hint of almond or a touch of citrus? Add a few drops of extract. Do you want it less sweet? Reduce the sugar. This customization means your whipped cream can perfectly complement any dish.
Whipped Cream for Breakfast

Breakfast is often called the most important meal of the day, and what better way to start your morning than with a touch of whipped cream? Incorporating whipped cream into your breakfast dishes can elevate them from mundane to magnificent.
Whipped Cream Pancakes with Fresh Berries
Imagine waking up to a stack of pancakes generously topped with freshly whipped cream and a handful of vibrant, juicy berries. It’s a breakfast that satisfies your hunger and feels like a treat.
Ingredients:
- 1 1/2 cups of all-purpose flour
- 3 1/2 teaspoons of baking powder
- 1 teaspoon of salt
- 1 tablespoon of sugar
- 1 1/4 cups of milk
- 1 egg
- 3 tablespoons of melted butter
- Freshly whipped cream
- Fresh berries (strawberries, blueberries, raspberries)
- Maple syrup


Instructions:
- Prepare the Pancake Batter: In a big bowl, sift the flour, baking powder, sugar, and salt. Make a well in the center and pour the milk, egg, and melted butter. Mix until smooth.
- Cook the Pancakes: Heat a lightly oiled frying pan or griddle over medium-high heat. Put the batter onto the pan, using approximately one-fourth cup for each pancake. Brown on both sides and serve hot.
- Assemble: Stack the pancakes on a plate, top with a generous amount of whipped cream and fresh berries, drizzle with maple syrup, and serve immediately.
Whipped Cream in Lunch Recipe
When we think of whipped cream, we often think of desserts and sweet treats. But this versatile ingredient can also be used in savory dishes, adding a surprising twist and elevating the flavors of lunch recipes.
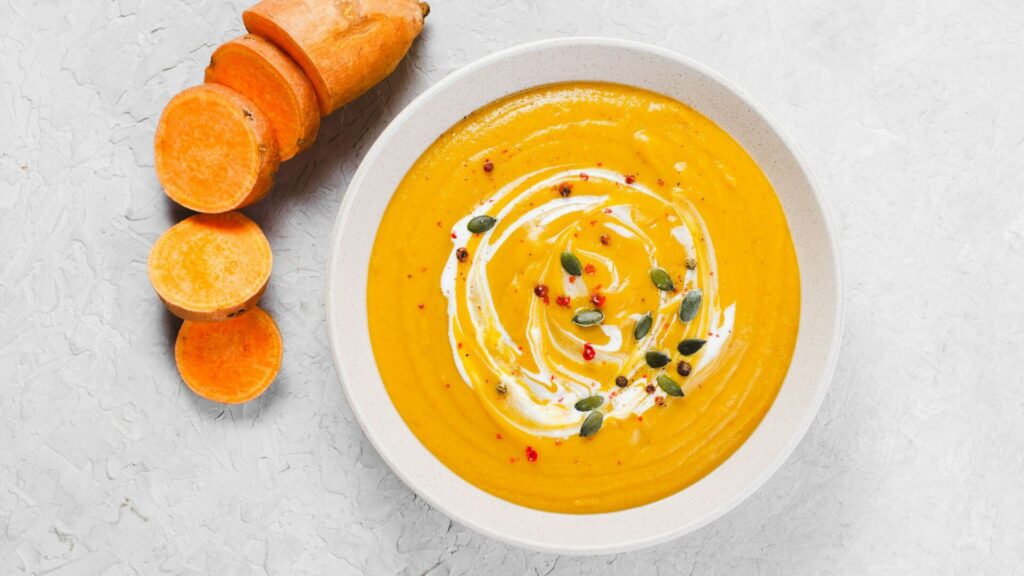
Sweet Potato Soup with Whipped Cream Swirl
Soup is a nutritious lunch option, and sweet potato soup is a perennial favorite. The potatoes’ natural sweetness, combined with the creaminess of whipped cream, creates a harmonious balance that’s both satisfying and delightful.

Ingredients:
- 2 large sweet potatoes, peeled and cubed
- 1 tablespoon of olive oil
- 1 onion, chopped
- 2 cloves of garlic, minced
- 4 cups of vegetable broth
- 1 teaspoon of ground cumin
- 1 teaspoon of ground cinnamon
- Salt and pepper to taste
- Freshly whipped cream
- Chopped fresh parsley (for garnish)
Instructions:
- Prepare the Vegetables: Heat a tablespoon of olive oil in a sizeable pot over medium heat. When it’s heated, add the chopped onion and minced garlic, sautéing until soft and fragrant.
- Cook the Sweet Potatoes: Add the cubed sweet potatoes to the pot, along with the cumin, cinnamon, salt, and pepper. Stir the potatoes to coat them in the spices.
- Simmer: Add the broth and bring everything to a boil. Reduce the heat. Let it simmer for about twenty minutes or until the sweet potatoes are tender.
- Blend the Soup: Using the immersion blender, puree the soup until smooth. If you don’t have an immersion blender, use a standard blender and do it in batches.
- Serve with a Swirl: Ladle the soup into serving bowls and top each with a generous swirl of freshly whipped cream. Sprinkle with freshly chopped parsley for color and added freshness.
Savory Tacos with Whipped Cream
Tacos are a beloved lunch option known for their versatility and vibrant flavors. Adding a good amount of whipped cream to your tacos can elevate them to a new level.
Ingredients:
- 8 small corn tortillas
- 1 lb of ground beef or turkey
- 1 packet of taco seasoning
- 1/2 cup of water
- Shredded lettuce
- Diced tomatoes
- Sliced avocados
- Freshly whipped cream
- Fresh cilantro (for garnish)


Instructions:
- Cook the Meat: Cook the ground beef or turkey over medium heat until browned in a large skillet. Drain any excess fat. Mix the taco seasoning and water, stirring to combine. Simmer for about 5 minutes or until the sauce has thickened.
- Prepare the Toppings: While the meat cooks, prepare your taco toppings. Dice the tomatoes, shred the lettuce, and slice the avocados.
- Assemble the Tacos: Lightly heat the corn tortillas in a dry skillet or microwave. Fill each tortilla with the seasoned meat, then top with lettuce, tomatoes, and avocado slices.
- Add the Whipped Cream: Finish each taco with a small dollop of freshly whipped cream. Garnish with fresh cilantro for an added burst of flavor.
Dinner Desserts
There’s something genuinely magical about ending a meal with a delectable dessert. When whipped cream is involved, it takes that magic to another level. Here are two delightful dessert ideas featuring whipped cream that will leave a long-lasting impression on your dinner table.
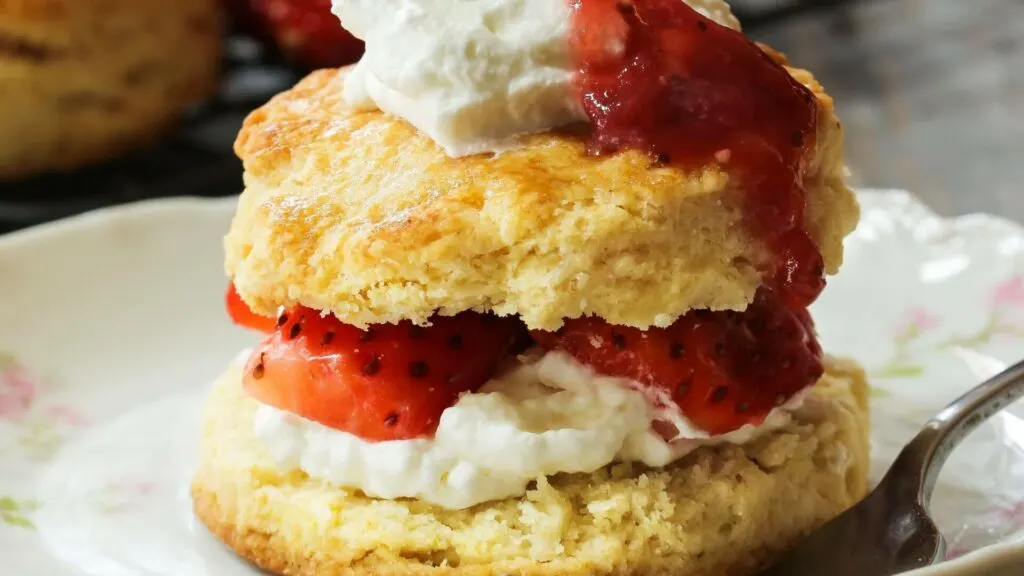
Strawberry Shortcake with Whipped Cream
Strawberry shortcake is a classic dessert that represents simplicity and elegance. The combination of tender shortcake, juicy strawberries, and fluffy whipped cream creates a harmony of flavors and textures that’s hard to resist.

Ingredients:
- 2 cups of all-purpose flour
- 1/4 cup of sugar
- 1 tablespoon of baking powder
- 1/2 teaspoon of salt
- 1/2 cup of cold butter, cubed
- 2/3 cup of milk
- 1 egg, beaten
- 1 teaspoon of vanilla extract
- Fresh strawberries, hulled and sliced
- Freshly whipped cream
- Additional sugar for strawberries (optional)
Instructions:
- Prepare the Shortcake: Preheat the oven to 425°F (220°C). In a large bowl, mix the salt, flour, baking powder, and sugar. Cut in the cold butter until the mixture resembles coarse crumbs. Stir in the milk, beaten egg, and vanilla extract until combined.
- Bake the Shortcake: Drop spoonfuls of dough onto a greased baking sheet, forming small mounds. Bake for twelve to fifteen minutes or until the shortcakes are golden brown. Allow them to cool a bit on a rack.
- Prepare the Strawberries: While the shortcakes are cooking, slice the fresh strawberries and sprinkle them with sugar, if desired. Let them sit for a few minutes to release their juices.
- Assemble the dessert: Split the shortcakes horizontally into half. Place the bottom half on a plate, spoon over a generous helping of strawberries, and top with a dollop of freshly whipped cream. Place the top half of the shortcake over the cream and add more strawberries and whipped cream on top.
Chocolate Mousse with Whipped Cream
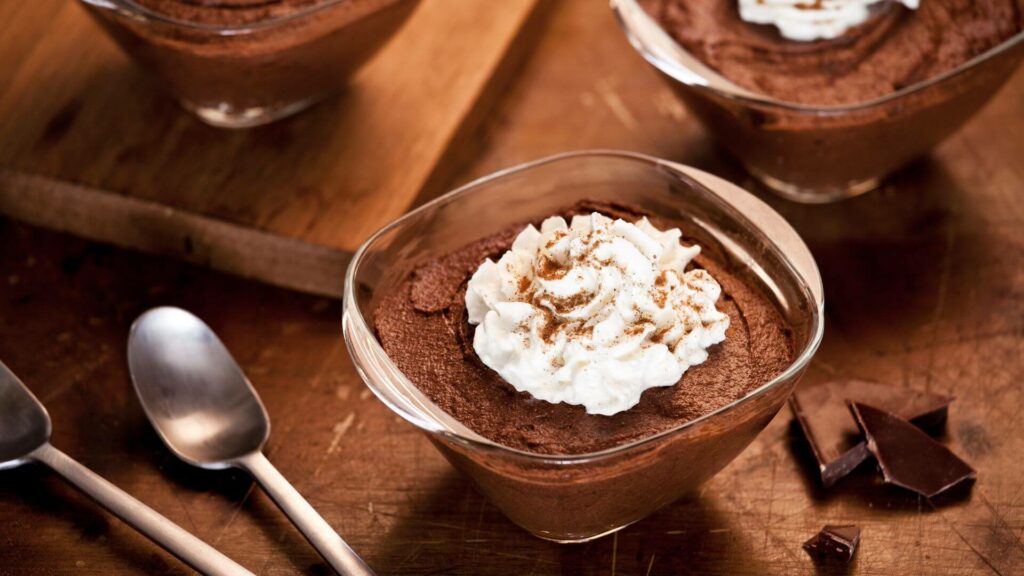

Chocolate mousse is a decadent, velvety dessert that feels luxurious yet is surprisingly easy to make. Topped with a light, airy whipped cream, it becomes an indulgent treat perfect for a special occasion.
Ingredients:
- 4 ounces of semi-sweet chocolate, chopped
- 2 tablespoons of butter
- 2 eggs, separated
- 1/4 cup of sugar
- 1/2 teaspoon of vanilla extract
- 1/2 cup of heavy cream
- Freshly whipped cream
- Chocolate shavings (for garnish)
Instructions:
- Melt the Semi-Sweet Chocolate: Combine the chopped semi-sweet chocolate and butter in a heatproof bowl. Melt them together over a pot of simmering water, stirring until smooth. Remove from heat and let it cool for a few minutes.
- Prepare the Egg Mixture: In a separate bowl, beat the yolks and sugar until thick and pale. Mix in the vanilla extract and melted chocolate.
- Whip the Egg Whites: Beat the egg whites in another bowl until stiff peaks. Slowly fold it into the chocolate mixture until fully incorporated.
- Whip the Cream: In a different bowl, whip the heavy cream until soft peaks form. Fold the whipped cream into the chocolate.
- Chill the Mousse: Spoon the mousse into individual dishes and refrigerate for at least two hours or until set.
- Serve with Whipped Cream: Top each mousse with a generous amount of freshly whipped cream and garnish with chocolate shavings before serving.
The Role of Whipped Cream Chargers and Nangs
Whipped cream chargers, often called “nangs,” are crucial in the modern kitchen, especially for those who enjoy convenience and efficiency. These tiny, pressurized canisters, filled with nitrous oxide (N₂O), are essential for making whipped cream quickly and effortlessly.
Understanding what they are, how to use them safely, and the best practices involved can enhance your culinary experience and ensure you create the perfect whipped cream every time.
What are Whipped Cream Chargers and Nangs?
Whipped cream chargers, or nangs as they are colloquially known, are small metal canisters filled with nitrous oxide. When used with a whipped cream dispenser, they release the gas into the cream, aerating it and creating that light, fluffy texture we all love. The nitrous oxide dissolves in the fat of the cream, forming tiny bubbles that make the cream expand and thicken.
These chargers are incredibly convenient for both professional chefs and home cooks. They save time and effort and ensure fresh whipped cream is always at your fingertips.
Whip cream chargers make the process seamless and efficient, whether preparing a quick topping for your pancakes in the morning or creating an elegant dessert for a dinner party.
Safety and Best Practices in Handling Whipped Cream Chargers
While whipped cream chargers are handy, using them safely and responsibly is essential.
Safe Usage Tips:
- Read the Instructions: Always read the manufacturer’s instructions for your whipped cream dispenser and chargers. Each model might have specific guidelines that are important to follow.
- Handle with Care: The chargers are pressurized, so handle them carefully. Do not expose them to high heat or puncture them outside the dispenser.
- Use Fresh, High-Fat Cream: For best results, use fresh cream with a high-fat content (at least 30%). Lower fat creams may not whip properly and can lead to inconsistent results.
- Charge the Dispenser Properly: Insert the charger into the designated holder and screw it onto the dispenser according to the instructions. You will hear a sound as the gas is released into the cream.
- Shake Well: After charging the dispenser, shake it well to ensure the gas is evenly distributed throughout the cream. This helps achieve the desired fluffy texture.
- Dispense with Care: Hold the dispenser upside down and press the lever gently when dispensing the whipped cream. Pour the cream directly onto your dish or into a bowl.
- Store Correctly: If you have leftover whipped cream in the dispenser, store it in the refrigerator. The cream will stay fresh for a few days. Before using it again, give the dispenser a few shakes to re-incorporate the gas.
- Dispose of Chargers Properly: Once used, chargers are empty and should be disposed of according to local recycling guidelines. They are typically made of recyclable steel.
Best Practices:
- Clean the Dispenser Regularly: After each use, clean the dispenser thoroughly. Dismantle it and wash all parts with warm, soapy water. Rinse well and allow to dry before reassembling. Regular cleaning prevents build-up and ensures the dispenser functions appropriately.
- Experiment with Flavors: Don’t be afraid to experiment with different flavors. Before charging your cream, add a splash of vanilla extract, a hint of almond, or even a touch of citrus zest.
- Use for Various Applications: Beyond topping desserts, use your whipped cream dispenser for other culinary creations. It’s excellent for making foams, infusing flavors into liquids, or creating savory whipped creams for soups and tacos.
- Monitor Usage: Be mindful of the number of chargers you go through, mainly if you use them frequently. Keeping track can help you maintain a good supply and ensure you never run out when needed.
- Educate Others: If you’re sharing your kitchen with family or friends, educate them on whipped cream chargers’ proper use and safety. This will promote a safe and efficient kitchen environment for everyone.
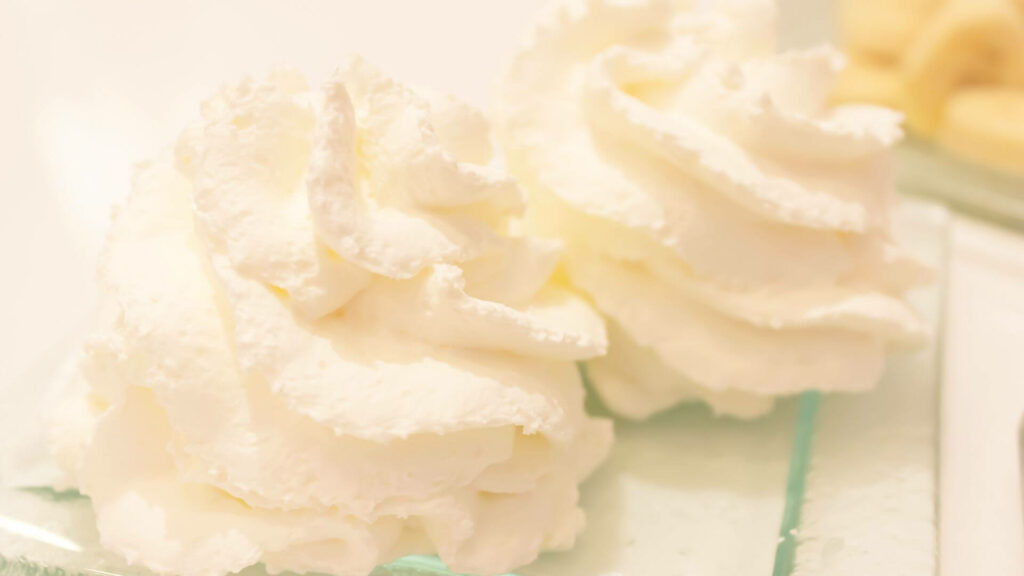
Whipped Cream: The Icing on the Cake

Whipped cream is more than just a garnish; it’s a versatile ingredient that can boost any meal from breakfast to dessert. Its power to add a touch of luxury and indulgence to various dishes makes it an essential component in any kitchen.
Whether creating a cozy morning breakfast, a delightful lunch, or a sophisticated dinner dessert, whipped cream can make each bite memorable.


Jessi is the creative mind behind The Coffee Mom, a popular blog that combines parenting advice, travel tips, and a love for all things Disney. As a trusted Disney influencer and passionate storyteller, Jessi’s authentic insights and relatable content resonate with readers worldwide.